Showing posts with label digital painting. Show all posts

Monday, May 23, 2016

Eye Tutorial

Simple Eye Tutorial


     Today I am going to do a simple eye tutorial. If you do portraits, whether animal or people, the eyes are the most important part of the painting. I start all my portraits with the eyes. If I can get the eyes right, the rest of the portrait will usually fall into place.
   
     An important part of drawing or painting eyes is knowing the basic anatomy of the eye. This will go a long way to getting them to look realistic. The major parts are the pupil, which is the black part in the middle, the iris which is the colored portion of the eye and the sclera which is the white part of the eye. In animal portraits, most of the time the sclera won't be visible. Parts that are often forgotten in drawings and paintings, but help the eye look real are the catchlight or highlight. This is the reflective part of the eye and adding it will help make the eye look wet and round. There is also the eyelid shadow at the top part of the eye. This is the area of the eye that is usually darker because of the eyelids shadow on the eye. It is often forgotten in painting, but when added, makes a more realistic eye.
   
     Last part before the tutorial, make sure you know the specific eye anatomy of the animal that you are drawing. Many animals have different shaped pupils, but this isn't noticed by the artist and they may end of drawing an incorrect eye. A couple of examples are that cats have oval pupils, not round like people or dogs. I've seen horses drawn with round pupils countless times, but in reality they have rectangular pupils! Snakes have slit or oval pupils as well, so it pays to know the anatomy of the subject you are going to draw.

Now I am going to use my cat Katie, whom I used for the fur tutorial. so lets get started.


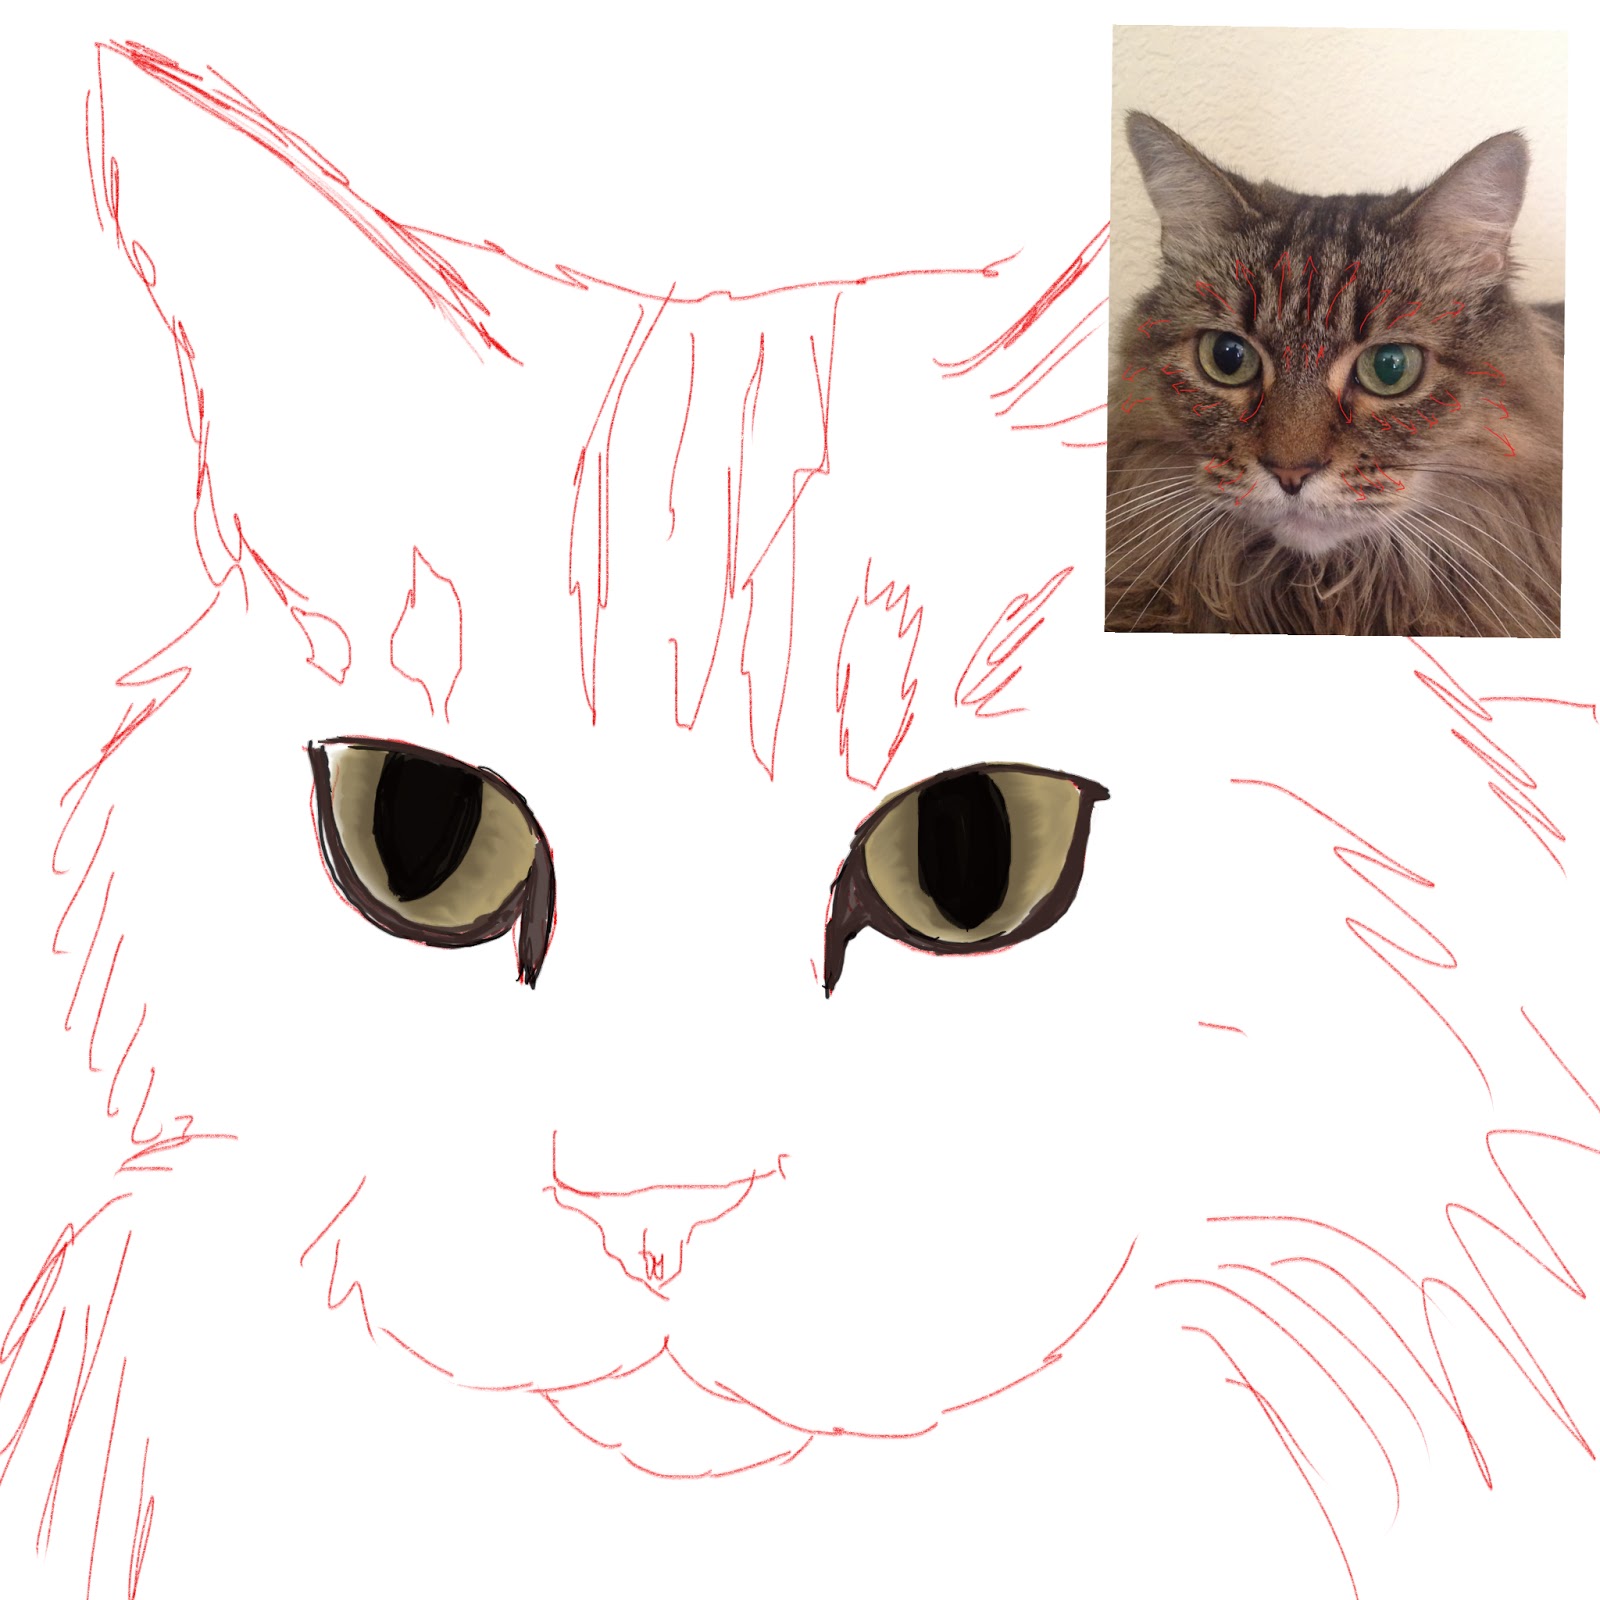
Step 1: I start with a line drawing on the bottom layer. On a new layer, I take a dark black color and color in the pupil and the eye rims. I have it at about 80% opacity so build up color layers til I get the depth I want. Since I am working in Procreate, I am using the Round Brush at about 50% size.


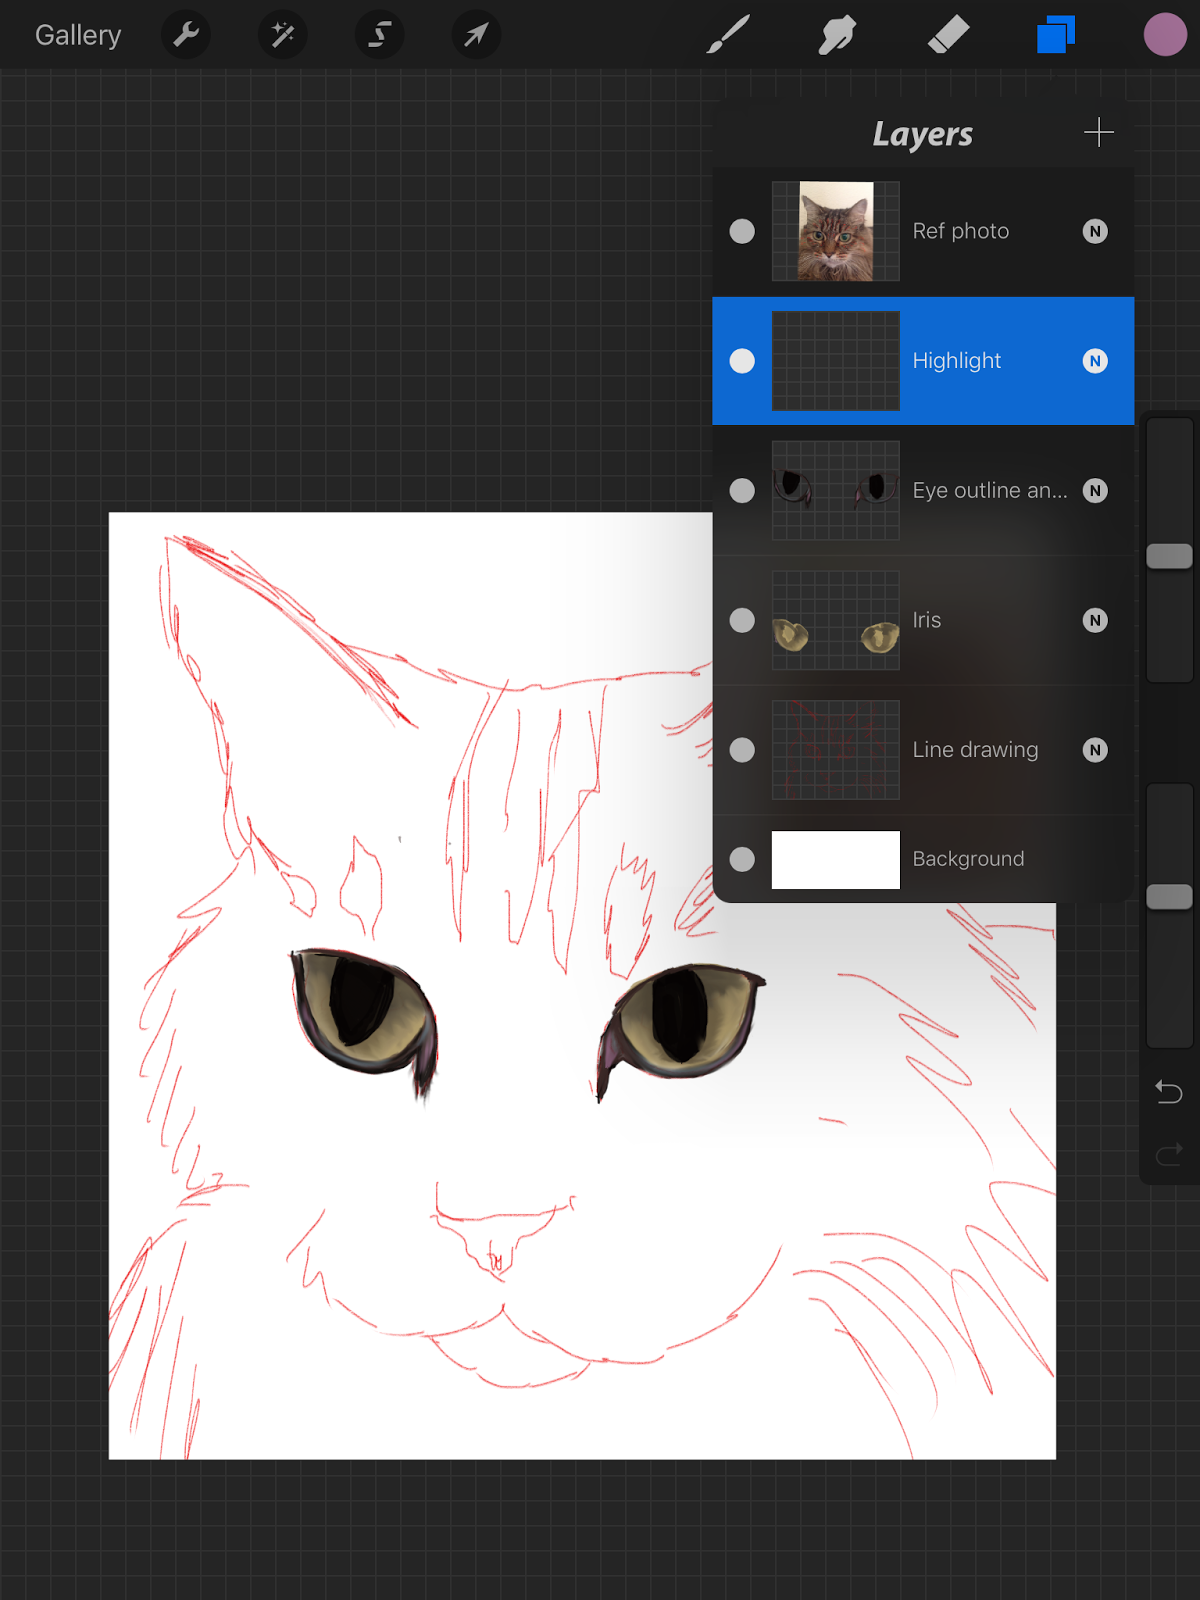
Here you can see the different layers. Layers are great as they keep the parts separate and the colors wont get muddy and blend into each other before you are ready to blend them.


Step 2: On a new layer below the pupil layer, I add a medium yellow green color for the iris color. I add it as an even flat color for now.


Step 3: Next, I add a darker yellow green color on the same iris layer. I radiate this color out from the pupil in a fan like pattern. We will blend these iris colors together in a future step.


Step 6: Here we blended the two colors together on the iris layer.


Step 7: I add a medium brown color to the eye rim on the pupil layer. This can also be done on a new layer if you want as well. If you do it on a new layer, place that layer below the pupil layer but above the iris layer.


Step 8: I add some peachy and pink colors to the eye rim and blend  together with the brown and black of the eye rim.


Step 10: Here we add the eyelid shadow on the iris layer.


Step 11: Here the eyelid shadow is blended in so there aren't any harsh lines. Sometimes I will add the eyelid shadow on a separate layer above the pupil and iris layers. Either way works.


Step 12: On the pupil layer I add a light blue color to the lower eye rim and blend in. This adds a shine and makes the eyelid look wet and gives more realism.


Step 13a: On a new layer above the pupil layer, I add our highlights. I usually pick a very light blue almost white color. I never use just white though as I think it looks too harsh.


Step 13b: Here is the highlights. They look white here, but in reality they are a very pale bluish white. It depends where to put the highlight, but I usually add two to each eye and have them half on the iris and half on the pupil. This isn't a set rule though.


Step 14: Blend the highlight so there are no harsh lines. You can use an airbrush blender or the round brush blender on 90% opacity.


Step 15: I add some extra blues and greens to the iris layer and blend these in. You can add lots of colors to give the iris more interest. Irises are never just green, blue or brown. There are usually lots of different colors in there to make each eye unique.


Step 16: I went back and added more color to the highlights. At the very end, I will merge the pupil, iris and highlight layers together and then blend. I feather out the pupil into the iris and blend the highlight into both so that it looks natural.


Step 17: This is before the merging of layers, but at this point I will merge the layers together and then blend to get everything blended together and looking natural.


     I hope you enjoyed this tutorial! It is very basic in how I approach eyes. I will spend a lot of time adding colors to the iris to add depth and interest and I will go back and forth a lot on this step.

I hope this helps anyone who is curious on how to draw eyes digitally!

Thursday, April 28, 2016

New Weekly Promotional Painting for Sale!


Hawaiian Sunset
     I offer a weekly promotional painting every week on Fridays, This week is early because I won't be available, but normally it is Friday through Sunday. This is an awesome way to get a high quality gallery wrapped canvas print for a much more affordable price. Each of my paintings will be offered this way only once, so it is important to check back each week and subscribe to my blog so you'll be the first to know about these deals.

     Anyways, this weeks promotional painting is my Hawaiian Sunset painting. I decided to go large with this print as it would look great as a large canvas print for a living room or office. The size of this canvas print is 36x24 inches and it is offered at only $100! This is more than $120 off the regular price for this size! Offer is good for only 5 prints and only until Sunday at Midnight, which ever comes first, so be sure to check it out here http://fineartamerica.com/weeklypromotion.html?promotionid=193574.

This painting was painted digitally on an iPad using the app ProCreate. 

Note that any watermarks you may see on the images, do NOT appear on the final purchased print.

Thanks for looking!

--Becky Herrera

Friday, April 22, 2016

Weekly Promotional Painting


Friday Promotional Painting!

Horse Portrait Close Up


     Every Friday I offer one of my paintings as a limited time promotion.  The promotion is for an 11x14 inch gallery wrapped canvas for only $50! This is approximately 50% off the regular price which makes it such a great deal. Each painting is only offered once this way and is limited to only 5 prints. The sale ends on Sunday at midnight.

This weeks promotional painting is my "Horse Portrait Close Up." This is one of my earlier digital works but I still really like it. I was actually still using custom brushes back then and created one to create the fur texture of this bay colored horse. This painting was created on an iPad 4 using the apps Procreate and Sketchbook Pro. It would look great in a living room or office or maybe the tack room of a ranch. This would also make a great gift for any horse lover as well.


Thanks for looking and stay tuned for future sales and promotions!


--Becky Herrera

Thursday, April 21, 2016

What is Digital Art?


Digital Art


Work in Progress of Oscar
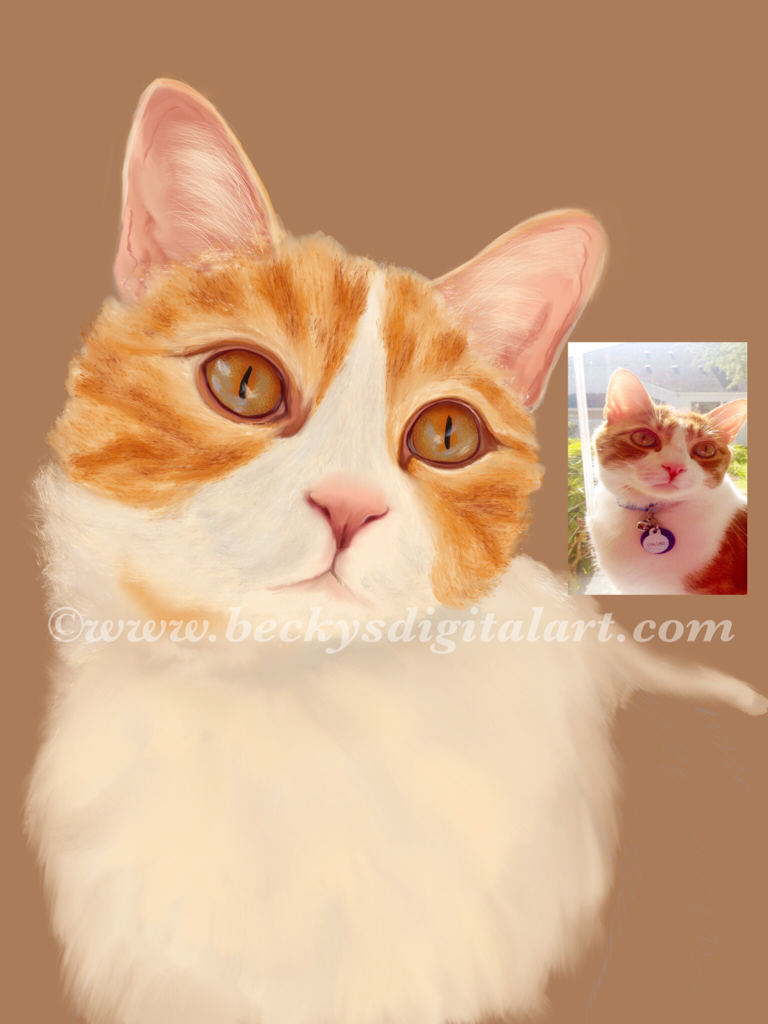
Painting of my cat Oscar
 So what is digital art really? According to wikipedia, Digital Art can be defined as any art that is made with the help of a computer. Drawings made on paper that are scanned in and changed in any way on the computer, photographs that are modified, 3D characters created using a computer are all examples of digital art. There are so many misunderstandings surrounding digital art, that in most circles, it isn’t even really taken seriously. This is a really sad situation. Most people think of photoshop filters when they think of digital art. They think of photo manipulation or that  someone puts a few photo color filters on and they are done. This isn’t true and even good photo manipulation can be an art form. There are many great artists on Fine Art America that use photo manipulation to a great end. They are usually photographers, but not always. 

     Then there is digital painting. Digital painting is basically painting using a stylus or mouse and creating the brush strokes on either a tablet or in the computer. There are even tablets to plug into the computer to make the painting process a little easier and more intuitive. Don’t get me wrong though, there is a learning curve when painting digitally, even when the artist may be an accomplished painter in traditional media.

Digital painting is an amazing art form and many effects can be achieved through it. Unlike in photo manipulation, digital painting starts out with a blank, digital canvas just as a traditional painter would. The digital artist builds up layers of color and digital paint to achieve the same thing any traditional painter would, a work of art. It may take less time to create, which is an argument of many traditional painters, but that is just because the digital painter doesn’t have any drying  or wait times. Most of my paintings take 10-15 hours to complete and sometimes more. I notice the better I get, the longer a painting takes. The following painting of "The Duel" took about 15 hours.


The Duel
 

 A digital artist and traditional artist are very similar. While an oil painter uses canvas and oil paints to make their art, a digital artist uses a digital canvas and pixels for paint to create theirs. Not one is better than the other, they are just different forms of art and each takes a unique set of knowledge and talent to achieve the end result, a work of art.

In closing, digital art is just the latest art form of the 21st century, it is stigmatized because it is new, just like watercolor was when it was new and colored pencils were 20 years ago. Even photography was stigmatized when the first cameras came out. 

Digital art is just art. The computer and the program are the tools, like brushes, pencils and paper,  but the artist is the one that uses those tools to create the masterpiece.

Example of fractal art


-Becky Herrera